$75
MASTER BUNDLE (All products)
MASTER BUNDLE INCLUDE
Includes ALL ITEMS from my digital store.
-LR Preset Pack 001
-Vertical Overlays
-How To Grow On IG Vol. 1
-Slog3 Lut
-Disruption Wallpaper Pack
-Oblivion Wallpaper Pack
__________________________________________________________________________
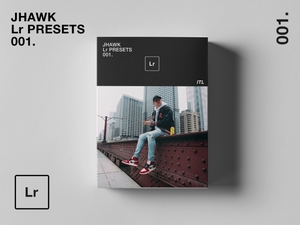
JHAWK LR PRESET PACK 001
This Pack includes Presets that I use to edit every single one of my Photos. If you've seen any content from me in the past 6 months I used one of these below for Tech, Sneakers, portraits etc..
What's included - 10x Lightroom Presets
- Rodman.
- Certified Fresh.
- Heritage.
- Taxi.
- Reverse Mochas.
- Lost & Found.
- Mocha.
- Coral.
- Travs.
- Panda.
This works for both Lr Mobile and Lr for Desktop!
CLICK HERE FOR MY INSTALLATION VIDEO
Also, Pro tip for presets: All picture exposures will vary a bit so if a preset doesn't look perfect in one click, try to adjust the Exposure, Temperature, and book good to go! This will still keep the tasty color profiles etc :)
__________________________________________________________________________
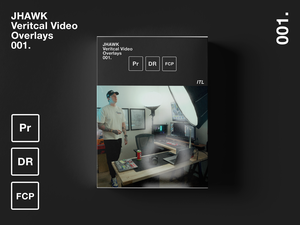
JHAWK VERTICAL OVERLAYS
This Pack includes overlays that I use to edit every single one of my short-form vertical videos. If you've seen any content from me in the past year, I used one of these below for Tech, Sneakers, portraits etc..
What's included - 10x CUSTOM Overlays
3x Burns overlays
3x Grain overlays
4x Flash overlays
WATCH THIS TO INSTALL/USE THESE OVERLAYS
I strongly suggest you watch the video above, but if you prefer the written instructions here you go…
THESE ARE 4K FILES THAT WILL WORK IN ANY EDITING PROGRAM
All you need to do is bring this folder of overlays into whatever project you are working on in whichever program of your choice.
Drag and drop one of the files on a layer ABOVE your footage.
Change the blending mode of the layers from this pack to screen.
Boom, that’s it!
I suggest messing around with this all. Try changing the scale, rotation, speed, etc to switch things up.
(also since these are 4k you may need to scale down if you are working in a 1080p timeline.)
Also a pro tip is to cover imperfections or scene changes/cuts with a flash or a part of the overlays that hide it. This takes your video to another level.
__________________________________________________________________________
How To GROW on Instagram Vol. 1 | E-Book
Over the past year, I have gained more than 100,000 followers on Instagram. Recently I had a spike where I gained over 50,000 in a three-month period of time. For the first time, I am going more in-depth than ever sharing my exact strategy on what I'm doing to see this growth.
This e-book is packed from start to finish with pages that include text, photo examples, and over 45 minutes of video with me walking you guys through everything in detail. I share tips & secrets that I've never talked about before.
Works on both Mobile & PC.
You will receive an email with a PDF attached. Download the PDF and then click the "click here to start" text and it will take you directly over to the E-book!
The email you use to purchase this will be the same email the PDF will be sent to.
You can download / open / and use this E-book on both PC & Mobile. You may have to make a free Canva account to access it on mobile but it's quick and easy.
__________________________________________________________________________
JHAWK SLOG 3 LUT
This is my fully CUSTOM personal lut that I have used in almost every single video so far in 2023. I never thought id honestly share this before, but I got enough questions about it I figured I would offer it. If you do pick this up, thank you so so much, this one is special to me...Cheers!
What's included -
1 Custom LUT
Installation Instructions
The LUT is a .cube fils that will work in editing software like Adobe Premiere, Final Cut Pro X, and Davinci Resolve.
This LUT is designed to work with Sony Slog3 footage. I strongly suggest to overexpose your footage by 1.7 on the camera's light meter and then this LUT should be PERFECT. It will also work on standard picture profiles just start with a very low % opacity and slowly increase it till you get the desired look.
I apply this as my base, then add one of my other LUTS on top at a low % for the perfect look, but this works standalone as well!
When applying a LUT to your footage, turn the opacity/intensity of the LUT all the way down to 0% and then slowly start increasing it. You can stop increasing the opacity/intensity when you feel like you’ve got the desired result that you’re looking for. For me though, this lut 100% works.
If during this process, you feel like part of your image is starting to look too dark or bright, you can make a simple exposure adjustment on your footage to fix this. The same concept applies to white balance as well. If your image is looking too warm or cool, a simple white balance correction in your highlights will instantly fix this.
__________________________________________________________________________
Enjoy! Thank you again for your support! It really means everything to me. Each purchase helps us to fund new original content - Stoked for what's to come!
Tag @JohnnyHochstetler on your edits on Instagram so I can see them!
NO REFUNDS OR EXCHANGES ON DIGITAL PRODUCTS